Objects of Desire

The practice of photography means different things to different people. There are the casual photo snappers all the way to serious practitioners of the art and craft. With different experiences and motivations to make photographs, the end results can vary wildly. For me, the end result is not simply a great image I can share on social media or look at on a screen. I want an artifact that I can hold in my hands. A printed photograph.

The combination of the paper, chosen by the artist to best enhance the presentation of the image printed on it, and perhaps the mat and framing all come together as the final artifact. One that will last on it’s own without support from some other technology. No batteries or screens required. It exists. It is.

Framed black and white prints on view to see as objects in themselves.

I can see amazing images online and be impressed, moved emotionally and have great respect for the effort made to create the image. I can say that I have never told myself “I have to have that image on my hard drive”. Not once. However, when I go to a gallery, art show or museum and see art on display, I find myself wanting the “thing” on the wall. It becomes an object that I desire. I want it because it is a real thing.

I want to touch on another thing an artifact brings. Perceived value. Maybe I am old fashioned in my thinking, but I can’t seem to feel that a digital file has as much value as a physical object. There is extra effort to bring an idea into a physical representation of that original idea. For example if a sculptor created a 3D model of a piece and then actually made some bronze castings of the piece the bronze artwork will have more value than just the digital file. The same principle applies for a digital image or even a film negative for that matter.

Photographs that you can touch and feel have a greater perceived value than a digital image on a screen.

We are being bombarded with digital imagery with social media, online news outlets and even snaps on a phone shared directly. It is almost overwhelming. With the volume of digital images it gives us the impression that it is commonplace and the value of a good photograph is diminished. When a photograph is printed, it demonstrates that the artist took the effort, from time of capture, through processing and printing to the final result. The artifact. This increases the perceived value of the photograph.

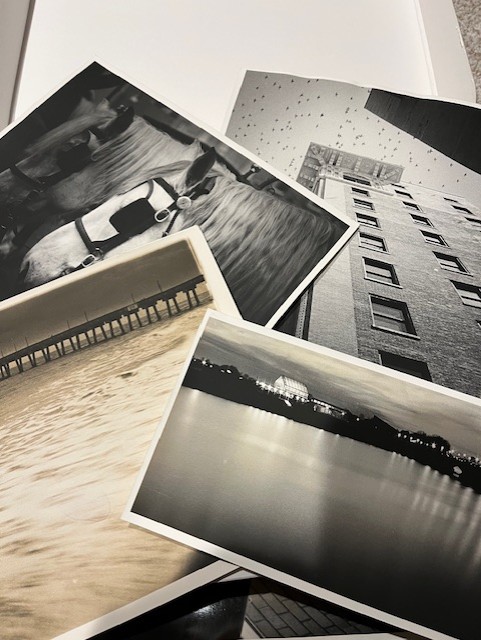
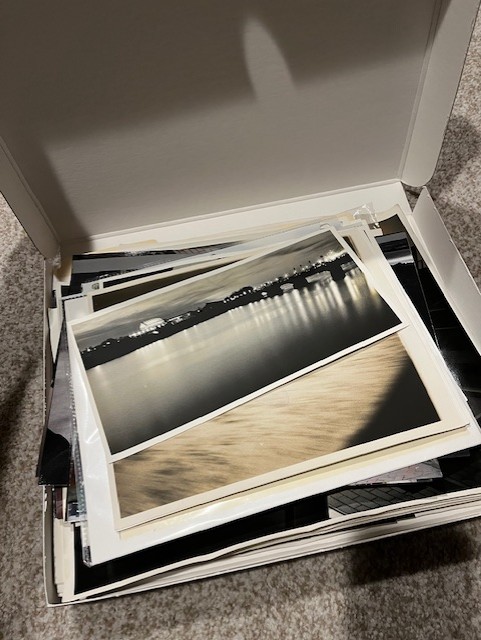
Printing a photograph takes some effort. Even before the digital photography era photographers didn’t print every image they captured. Contact sheets helped the photographer choose the keepers and ones to pursue to a final print. I enjoy having final prints that I can sit down with and look at in my hands. Sitting with a box of final prints or a book of a photographers work and slowly looking and internalizing the photograph is almost a therapeutic process. I can turn off all my distractions, computer, TV, Phone etc. and enjoy without any interruptions.

Box of prints that can be viewed with a nice cup of (insert your favorite beverage) without interruptions.

I guess what it comes down to and what I am trying to say, is that a printed photograph is important in any photographers practice. If you are a photographer who doesn’t print often or at all, I would encourage you to print your work. There is a next level of understanding and learning you will gain when you do.


If you like the content I post here on the blog then maybe you will be interested in my email newsletter. I send them out with other news, thoughts and tips on photography as well special print offers. Add your email in the form below. You can unsubscribe anytime, you won’t hurt my feelings.

Winter Project

Building a Darkroom for Black and White Silver Printing

Over the past few years I have been shooting film without a proper darkroom space to print silver prints. I have been busy with a house move, starting a new job, restoring/remodeling and old house and of course we can throw the Covid pandemic in there for a little fun. With all those things going on along with the normal stuff, I didn’t really have time to focus on a darkroom. When I first moved into the house I am in now I was happy that it had the potential space for one. I told myself some day soon it was going to happen.

Why would anyone want to spend time in the red and amber light of a darkroom?

“Why would you bother with the whole darkroom thing in this day and age” you may ask. Well, the creative process is different for everyone I would say. Some painters choose to use water color, others use oil and yet another may be carving and block printing. All can be simulated on the computer too. It boils down to the fact that using traditional photographic tools is rewarding to me. Especially when the end result is a beautiful black and white silver print on fiber paper.

I have scanned my negatives, shot with my DSLR and mirrorless cameras for the last few years. Used computer editing etc. and I have some really nice images and prints but for some reason I don’t have the same satisfaction as I do when I look at my darkroom prints. It is always a let down when I print an inkjet print. They look great but it’s just very anticlimactic to me. I can’t really put my finger on it. I enjoy the darkroom process and results more, so I am going with it.

I am dealing with a pretty small space so it will be a modest build. It won’t be fancy, just enough. My goals are to be able to print mostly 8×10 and 11×14 regularly but on occasion I want to print 16×20. That will be another solution to come up with once I finish the build out. I have all I need for equipment. Enlarger, trays, timer etc. What I need to do is design and build a sink that will fit, a stand for the enlarger, add the pluming and some wiring.

The Sink

I have to really plan the size of this sink for the space I have and the size of trays I want to use. The space is roughly 12×5 feet. Long and skinny. I am limited to a 5.5 foot long where the easiest access is for adding the pluming is and it can’t be too wide because I need room for the other stuff.

Initial construction of my darkroom sink.
Sink assembled and joints sealed, ready for paint coating.

I have read many forum posts, blog posts and YouTube videos about building a darkroom sink. Frankly I think they go way overboard with building one. Some recommend using marine quality plywood and fiberglass with epoxy resin, or using stainless steel sinks and other materials. I am not planning to set sail in my sink… I mean after all it’s really just a big splash tray with a drain. I don’t have any need to fill it up with water. I wash my prints in trays and the water just flows down the drain. So in keeping with the just enough idea I am building the sink out of simple pine 1/2 plywood, pine 1×8 board, 2×4 and some 1×1/2 stringers. Mostly stuff I have left over from my home remodel. All seems are screwed and filled with strong flexible builder grade exterior caulk. The final coating is a high quality primer and several coats of premium exterior house paint.

Darkroom sink painted and placed in it's intended location.
The sink with its final coatings and in it’s place

Some may po po my approach but the cost to me is almost $0 because I have it lying around anyway. If it fails on me then I can recoat it or just build another one for about $60 and this approach lets me avoid the toxic fumes of resin when I have to work indoors over the winter.

Up Next

The next items on the list will be to build a enlarger stand and some storage for all the bits I’ve had in boxes for the last few years. Once that is out of the way then I will be adding electrical for regular lighting and for safelights, enlarger, print dryer etc. Once I can see things better I will be adding the pluming to this space.

Pluming should be pretty straight forward. I have both hot and cold lines just a few feet away from this space that I will extend to the sink and a floor drain close that will be used for the drain. Of course there will be some things to sort as I go but so far I think the biggest piece is complete. More to come in future posts.


If you like the content I post here on the blog then maybe you will be interested in my email newsletter. I send them out with other news, thoughts and tips on photography as well special print offers. Add your email in the form below. You can unsubscribe anytime, you won’t hurt my feelings.

Color When Color Matters

Autumn is when I get my eye for color

I love black and white photographs, it really gets my motor running. But… there is a time for color photography, and autumn is one of those times. Each year I start to look at the trees changing colors and enjoy the subtle and dramatic changes that happen day to day. The cool, dryer days with the sun hitting your skin while walking in the rustle of leaves at your feet is such a magical experience.

Monochrome images just can’t capture and convey the emotions of autumn in my view. Fall is the time for color imagery. Of course when shooting with color and fall woodland it presents new challenges for making meaningful photographs.

Color itself is a whole different disciple from monochrome. Black and white photographs are already one step removed from reality, making it easier to create images that evoke emotions, memories and feelings. Color on the other hand, puts you in a box of sorts. It’s really easy with today’s digital processing tools to go way overboard, creating images that don’t look plausible. My work depends on the image to be real (ish), not a entirely a fiction but something someone may have been able to see, feel and experience themselves. At the same time having an new experience with my image.

Maple and birch trees showing their last throws of fall color.

Then there is the challenge of capturing something from the chaos of the woodland. Oh my goodness is that hard… I have my hero’s in the woodland landscape discipline and have learned a few tips. However, nothing prepares you for how hard it is to get a good clean image that tells a story or strikes an emotional chord in a woodland. There is so much chowder everywhere you look in the forest. I think I have 3 images total that I like since I have been trying to capture the magic of the forest. Countless failures.

The image in this post was literally the last one I took on a recent outing to the forest. I was failing miserably and headed for the car. Off in the middle distance I saw this maple and birch intertwined together in the last display of color for a large portion of this woodland. I chose my 300mm lens so I could reach out and isolate the trees. With the light being really low due to fog and clouds, and wanting to focus the viewers attention to the trees, I chose a faster aperture than I may have for another landscape. This worked well with the longer lens and I was pretty happy with the results.

Woodland Photo Tips

If you want to try some woodland photography here are a few tips I use. Note: your mileage may vary

  • Edit your composition. Keep only what is necessary in the frame
  • Use longer focal length lenses OR get closer with wide lenses
  • Eliminate the sky whenever possible
  • Find compositions where there is a hillside or thick forest in the background
  • Get low or get high, normal viewing height rarely works
  • Shoot when fog is present for separation from your subject if possible
  • Avoid sunny conditions. Bad weather makes for better woodland photos

Get the latest from me in your inbox

If you like the content I post here on the blog then maybe you will be interested in my email newsletter. I send them out with other news, thoughts and tips on photography as well special print offers. Add your email in the form below. You can unsubscribe anytime, you won’t hurt my feelings.

Black and white is the first step to abstraction